Configuration settings
After scanning is complete, the system is updated with all the functions necessary to control the climate and irrigation equipment in your greenhouse. (These functions are called the controls.) However, before your equipment can be controlled fully automatically, you first need to enter certain configuration settings and control values. To access the configuration settings, tap the System Time icon ‘ '.
'.
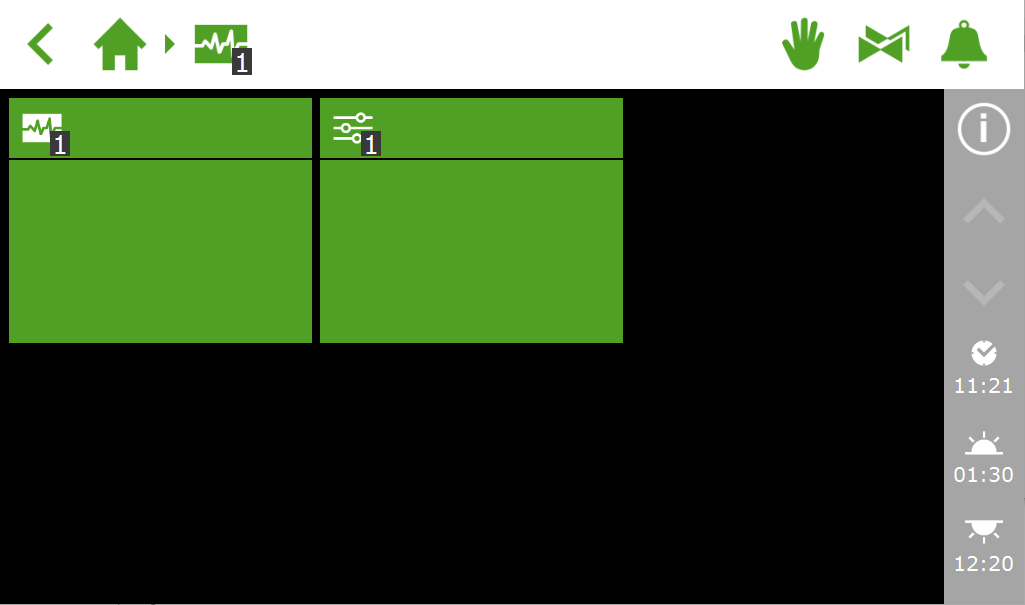
Figure 41: Tap the System Time icon to open the configuration menu.
To access the configuration settings, navigate this path:  .
.
The following settings are required:
- Time Required for time-related settings, such as: system date/time , time format and time zone. Click
 here.
here.
- Location The system's location is necessary in order to determine the sunrise and sunset times. Click here.
- Network address If a network is required, you need to check your network settings. Click here.
- Physical components Various controls have purple tiles representing the physical components. Click here.
System time
The system time needs to be set correctly in order to ensure that automatic control actions are performed at the right times. You can find the required settings on the settings screen ' '.
'.
The time-related settings are:
-
System date/time
The system date/time is displayed automatically. Check whether the System date/time setting is correct.
-
Time format
You can choose from a 12-hour format (using AM and PM) or a 24-hour format. Use the Time format setting.
-
Time zone
You need to specify your current time zone and the UTC offset (compensation) for your location.
Current time zone
The HortiMaX-Go! cannot automatically determine when Summer Time (Daylight saving time) and Winter Time (standard time) start and end. This is because Summer Time and Winter Time do not take effect everywhere at the same time and some countries have different rules regarding these time adjustments. That means that you need to adjust the current time zone manually.
- Tap the Current time zone setting.
- Select the applicable time zone.
- Tap confirm ‘
 '.
'.
You have set the current time zone.
Time zone offset summer and winter time
The time zone offset for summer time (daylight saving time) and winter time (standard time) can be determined based on the UTC (Coordinated Universal Time). The time zone offset is the number of hours/minutes that your local time differs from the UTC. This offset needs to be set for both summer time and winter time. The offset for summer time will usually be 60 minutes less than that for winter time.
Use the Time zone offset winter time and Time zone offset summer time to set the offset manually.
Example
The offset for a location in North America is 5 hours. This means that you need to enter the following on the HortiMaX-Go!:
- Time zone offset winter time [min] = -300.
- Time zone offset summer time [min] = -240.
Location
The system's location is necessary to determine the sunrise and sunset times. This location can either be retrieved automatically or entered manually.
Retrieve automatically
If a Meteo-Go! is connected to your system, then the location can be detected automatically based on the internal GPS chip.
The location settings can be found on the settings screen ''.
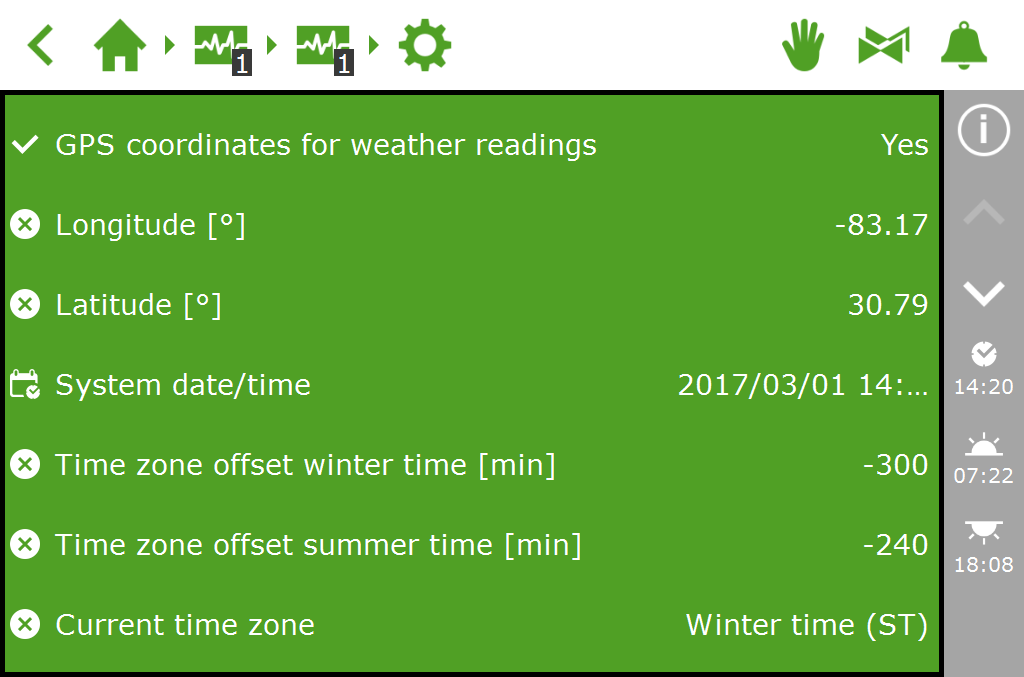
Figure 42: The 'GPS coordinates for weather readings' setting is enabled
Enter manually
A GPS location can be indicated in various ways. The HortiMaX-Go! uses the 'signed degrees' format. This means that:
- a positive longitude is used for the Eastern Hemisphere (this is east of Greenwich).
- a negative longitude is used for the Western Hemisphere.
- a positive latitude is used for the Northern Hemisphere (this is north of the equator).
- a negative latitude is used for the Southern Hemisphere.
The Longitude and Latitude settings can be found on the settings screen ''. Tap the longitude (or latitude) setting to enter a location manually.
Network address
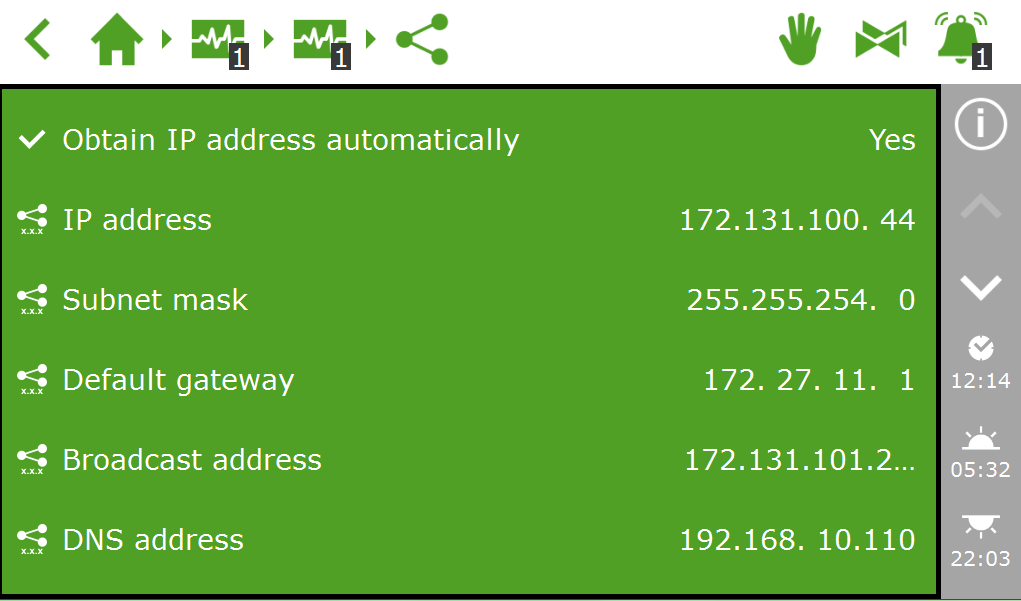
If the HortiMaX-Go! has been connected to the network correctly, the IP address will be retrieved automatically. The system uses the router's DHCP service to set the IP address. It is not possible to set the IP address manually.
The network data can be found on the network settings screen ' '.
'.
Figure 43: Network settings
- Switch the Obtain IP address automatically setting to 'Yes'.
- Check whether the IP addresses have been entered.
If this is not the case, make sure that the cables have been connected properly and that the router has been set to DHCP server. If necessary, contact your network administrator.
Physical components
The purple tiles represent the physical components (connected devices) in the system. Certain devices have specific properties or configuration settings ‘ ' that you can change. For other devices, you can only view data on the readout screen ‘
 '.
'.
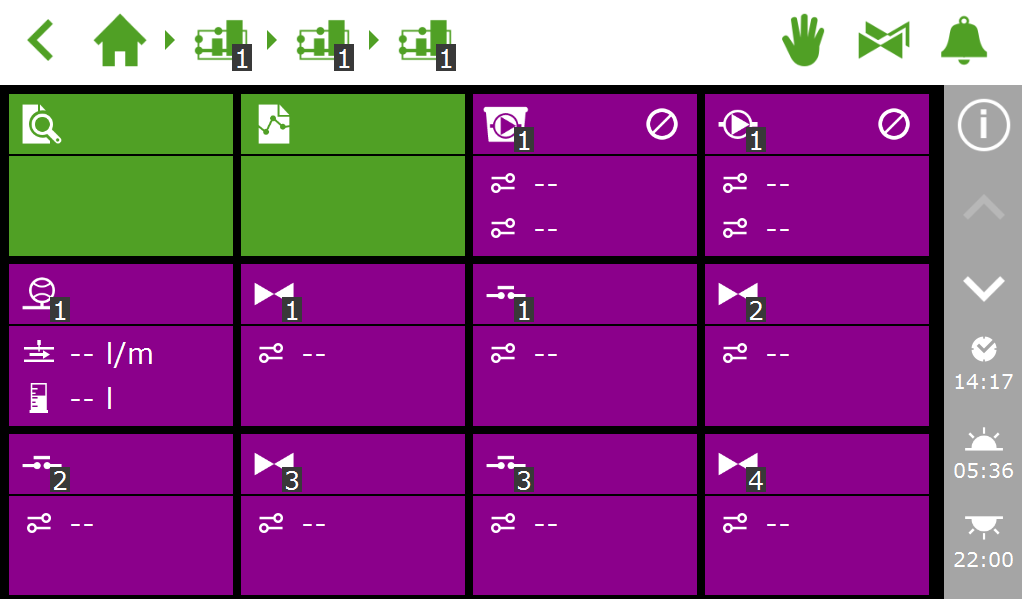
Figure 44: Purple tiles
Example
A valve only provides readout information, such as 'valve status'. In contrast, the flow meter has both configuration settings and a readout screen. This means that you can set the K-factor and view the flow rate for the flow meter.

Figure 45: Left: valves only have a readout screen, right: the flow meter has both configuration settings and a readout screen.