Irrigation control
To control irrigation automatically, you need at least the following Smart Switches: Alarms (includes weather/meteo), System Pump and Valves.
You also need to set up the following in the software:
As with the climate control program, the irrigation program works with user-definable periods. These can be found at top of the settings screen. To get to this screen, you can navigate this path, for example:  . Tap a period to open the Set periods screen. See Periods for more information.
You need to enter the irrigation settings, such as 'Valves simultaneously’ and 'Calibrate sensors’, during installation. See Irrigation settings for more information.
Assigning valves to valve groups
The irrigation program works based on valve groups. A valve group consists of one or more valves including the start conditions and irrigation settings set for those valves.
To assign valves to a valve group, navigate the following path (for each valve group):  .
.
- Tap the Assign Valves to Valve Groups icon ‘
 '. A pop-up window appears.
 - Select the valves that you want to assign to the valve group by tapping them. A white border appears around the selected valves.
- Tap confirm ‘
 '.
'.
You have assigned valves to a valve group.
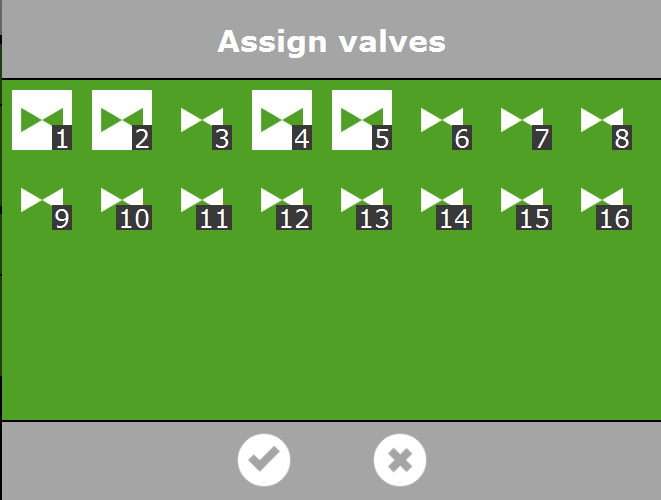
Figure 21: Assigning valves
The irrigation program enables you to use a separate valve group for each valve.
Duration and volume
To start using the irrigation program, you need to set at least one of these values for the valve group:
-
 Volume: the desired volume of irrigation (in litres). To set this value, the system must be equipped with a flow meter.
 -
 Duration: the length of time that the valves will be open (in seconds).
You can set the volume and the duration on the settings screen for automatic irrigation. To get to this screen, navigate the following path: .
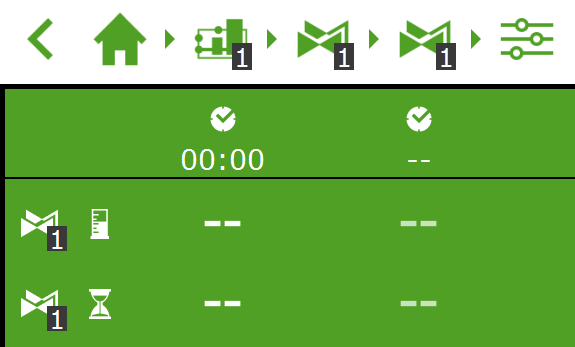
Figure 22: You can set the volume and the duration for each predefined period.
- Tap volume (or duration) in a period. A pop-up window appears.
- Set the volume in litres in (or the duration in seconds).
- Tap confirm ‘'.
You have set the volume (or duration).
Dosing fertilizers
In order for the system to dose fertilizers, you need to set the desired EC value for each valve group.
You can set the desired EC (and pH) using the settings screen for automatic irrigation. To get to this screen, navigate the following path: . The EC (and pH) settings are listed at the bottom; use the arrow down button to get to these settings.
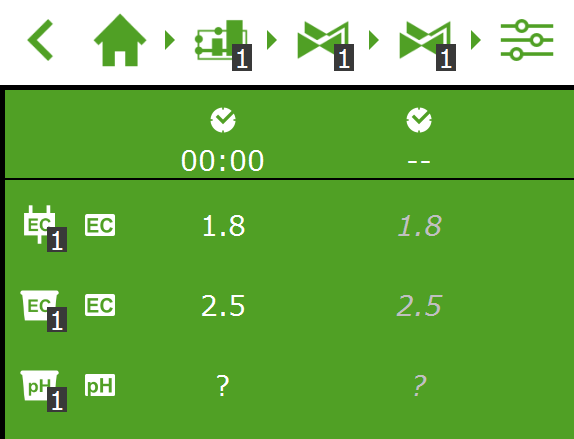
Figure 23: You can set the EC (and the pH) for each predefined period.
- Tap EC (or pH) in a period. A pop-up window appears.
- Set the desired EC value in mS/cm (or the pH).
- Tap confirm ‘'.
You have set the EC dose (or pH dose).
Dosing ratio
If more than one fertilizer is used, you can set the dosing ratio of each fertilizer. To set the dosing ratios, navigate this path:  .
.
By default, the irrigation program uses the same ratio for all available fertilizers.
- Tap one of the Fertilizer ratio settings (for example, 'Ratio fertilizer 1') A pop-up window appears.
- Enter a percentage.
- Tap confirm ‘'.
You have entered a fertilizer ratio.
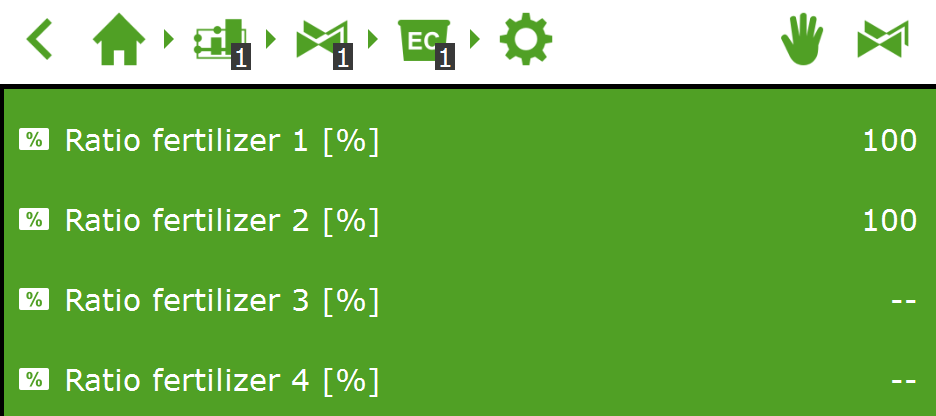
Figure 24: Dosing ratios of fertilizers
The HortiMaX-Go! supports up to four dosing channels for fertilizers. To set the number of fertilizers, navigate this path:  .
.
Start conditions
You can activate a valve or valve group manually or preprogram the start conditions.
Manual starts
The irrigation program includes two types of manual starts:
-
Manual valve start
Use the manual valve start to select valves that you want to open now.
-
Manual valve group start
Use the manual valve group start to activate a valve group (using predefined recipes/valves).
Manual valve start
- Navigate the path:
 .
. - Tap the Manual Valve Start icon '
 '. A pop-up window appears.
 - Select the valves. A white border appears around the selected valves.
- Tap the Start icon ‘
 '.
'.
The irrigation program now activates the selected valves using the recipe of the valve group from which you opened the screen and that applies for the current period. The manual valve start tile '‘ displays when the last manual start was performed.
Figure 25: Manual valve start tile
Manual valve group start
When you activate a valve group manually (i.e. execute a manual start), the irrigation program activates the valves assigned to that group and applies the preprogrammed recipe. You can activate a valve group manually on the Manual valve group control screen.
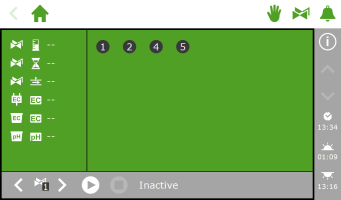
Figure 26: The Manual valve group control screen
- Tap the Manual Valve Group Control icon ‘
 ' on the top bar.
 - Select a valve group (bottom left).
- Tap the Start icon ‘'.
You have activated a valve group.
The Manual valve group control screen displays the details of the valve group, such as the volume, the duration and which valves are active.

Figure 27: Active valve group
If you want to a different recipe to be applied for a manual valve start, you can change the EC, pH and volume settings of the valve group. Do not forget to change the settings back afterwards. An alternative method is to assign the desired valves to a group that is still 'free'. You can program different recipe settings for this group without changing your standard recipes.
Preprogramming start conditions
The irrigation program includes a number of start conditions that can be preset or preprogrammed:

|
Cyclic start |
A cyclic start applies for a specific period and valve group. When the preset cycle time elapses, the valve group is reactivated (i.e. irrigation starts again). The cycle time is reset after each start (of each type). |

|
Contact start |
The group is activated once the selected contact is activated. |

|
Radiation sum start |
The group is activated once the preset radiation sum (J/cm2) is reached. The radiation sum is reset once the irrigation cycle is complete and at midnight (0.00 hours). |

|
Time start - one-off
|
Start irrigation one time on the preset date and time (using the recipe settings applicable at that time) |
|
|
Time start - daily
|
Start irrigation on the selected days at a preset time (using the recipe settings applicable at that time) |
|
|
Time start - interval
|
Start irrigation at the preset time after each interval of a preset number of days. |
To set a cyclic start, contact start of radiation start, navigate this path: . Here you can set the start conditions for each period.
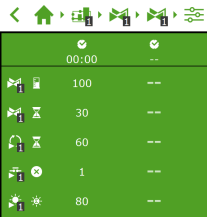
Figure 28: Irrigation start conditions
You can set the time starts on the Time start array screen. Complete the following steps to add a time start:
- Navigate the path:
 .
. - Tap the Settings icon ‘
 '. The Time Start Array screen appears.
 - Tap the Add icon ‘
 '.
'. - Select the type of time start that you want to add.
- Enter the associated data.
- Tap confirm ‘'.
You have set a time start.
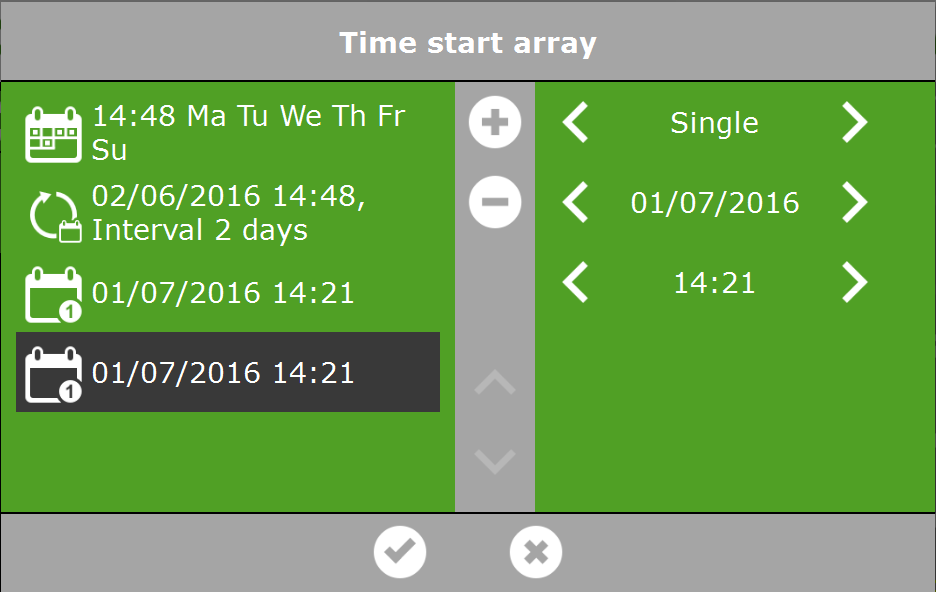
Figure 29: Time starts
When automated irrigation starts are executed, the irrigation program always uses the recipe settings of the valve group that were set for the period that is currently active. If no period is currently active, then irrigation will not start automatically.