System settings
When using the system for the first time, you need to set the desired display language and unit of measurement. You also need to specify which components (Smart Switches) are present in the system.
New start
When you start up the system for the first time, you will be taken to the start-up menu. Here you set the display language and the unit of measurement.
Please note that you cannot alter the unit of measurement later.
Example

Figure 38: Start-up menu
- Tap the Language setting. A pop-up menu appears.
- Select the desired language.
- Tap confirm ‘
 '.
'.
- Tap the Unit of measurement setting. A pop-up menu appears.
- Select the desired unit of measurement.
- Tap confirm ‘'.
- Tap the Confirm setting. A pop-up menu appears.
- Select Yes.
- Tap confirm ‘'.
You have completed the necessary steps in the start-up menu. The scanning screen now opens automatically.
Scanning
The control switches of the HortiMaX-Go! are called Smart Switches. To operate correctly, the system needs to know which Smart Switches are present. For this reason, you need to scan the system. You can do this using the scanning screen. This screen opens automatically when you use your system for the first time.
To open the scanning screen manually, proceed as follows:
- Tap the System Time icon ‘
 ’ to open the configuration screen.
 - Navigate the path:
 .
.
Initially, the scanning screen is empty. This means that no Smart Switches have yet been detected.
- Tap the Scan icon ‘
 '.
'.
The system now starts scanning for Smart Switches. Once scanning is complete, all Smart Switches detected in the system will appear.
Example
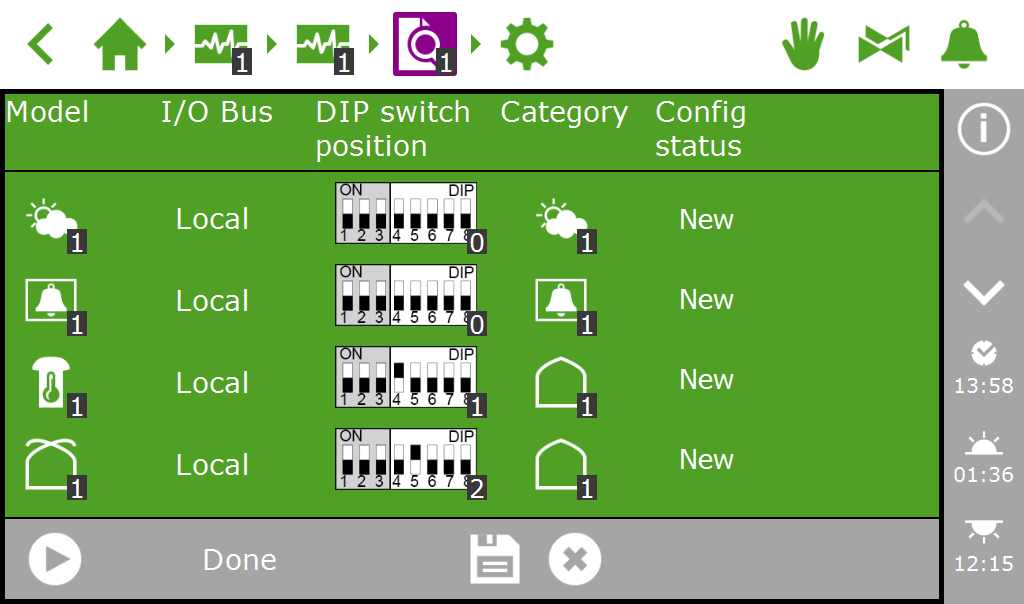
Figure 39: Smart Switches found in the system.
If Smart Switches are found that are not used or connected, you need to remove these from the configuration. You can do this by changing the configuration status of these Smart Switches. You do this as follows:
- Tap the Smart Switch that you want to disable/remove. A pop-up menu appears.
- Select the desired status.
The status has been changed.
If necessary, you can restore the previous configuration status. To do this, repeat the above steps and then select the 'Restore' status.

Figure 40: Changing status
Once you have checked all the components and made sure that the configuration is correct, tap the Save icon ‘ '. The system updates the configuration automatically and then takes you to the home screen.